Arizona Printworks
Can-Am X3 Rear Shock Remote Reservoir Relocation System (RRRS) - Blue
Can-Am X3 Rear Shock Remote Reservoir Relocation System (RRRS) - Blue
Couldn't load pickup availability
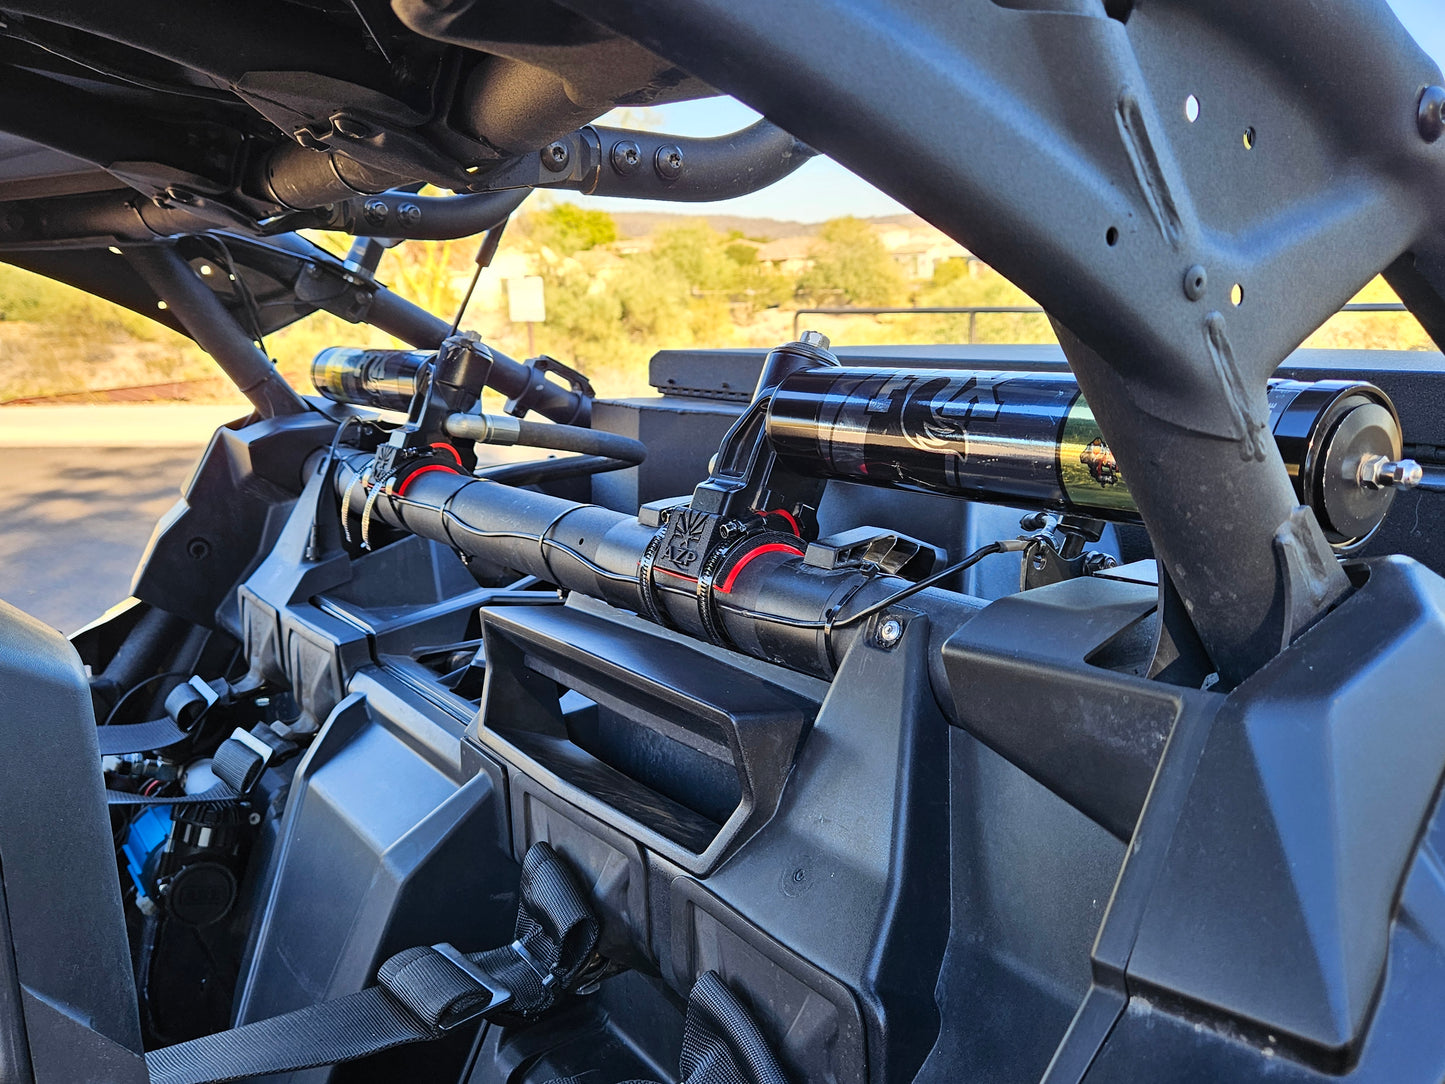
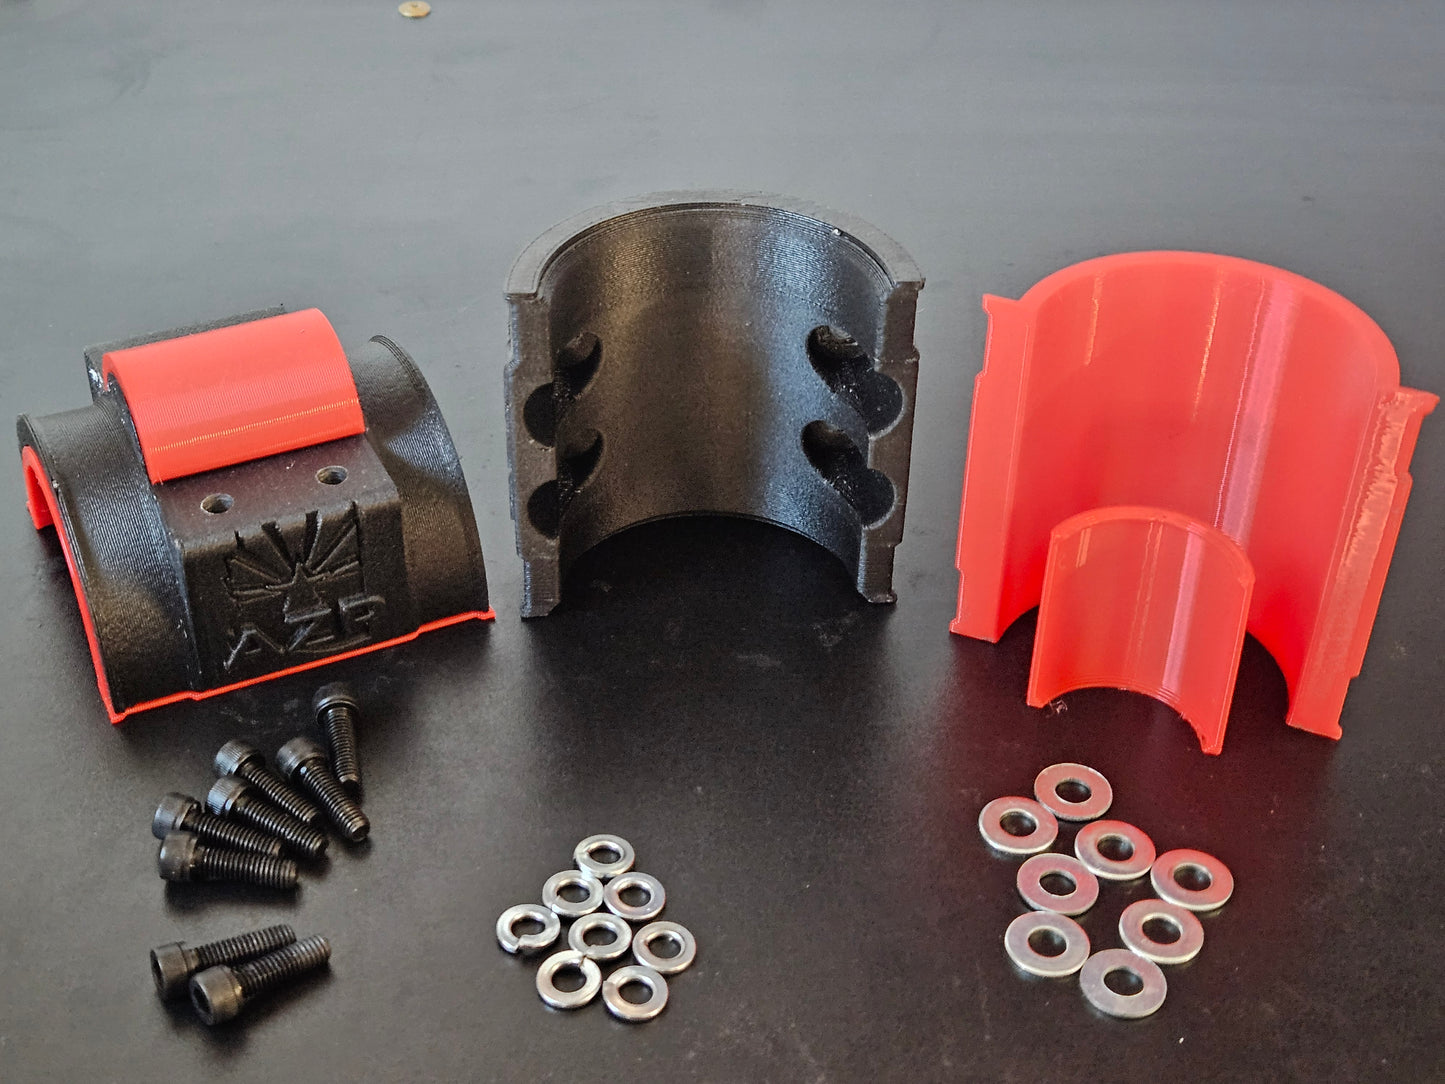
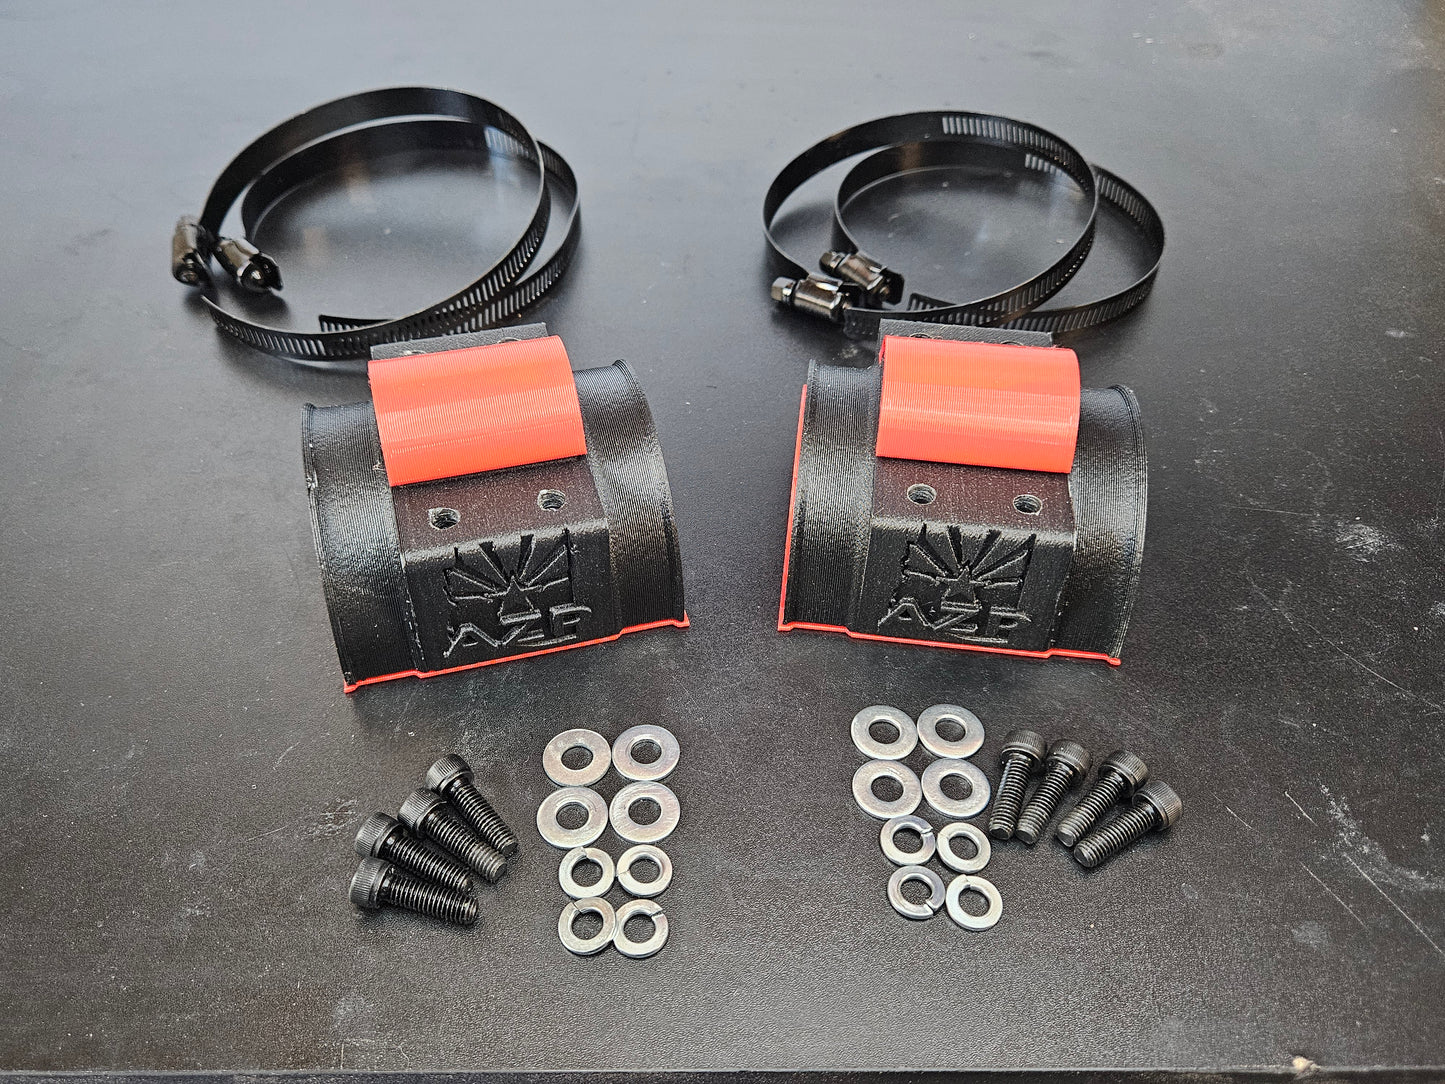
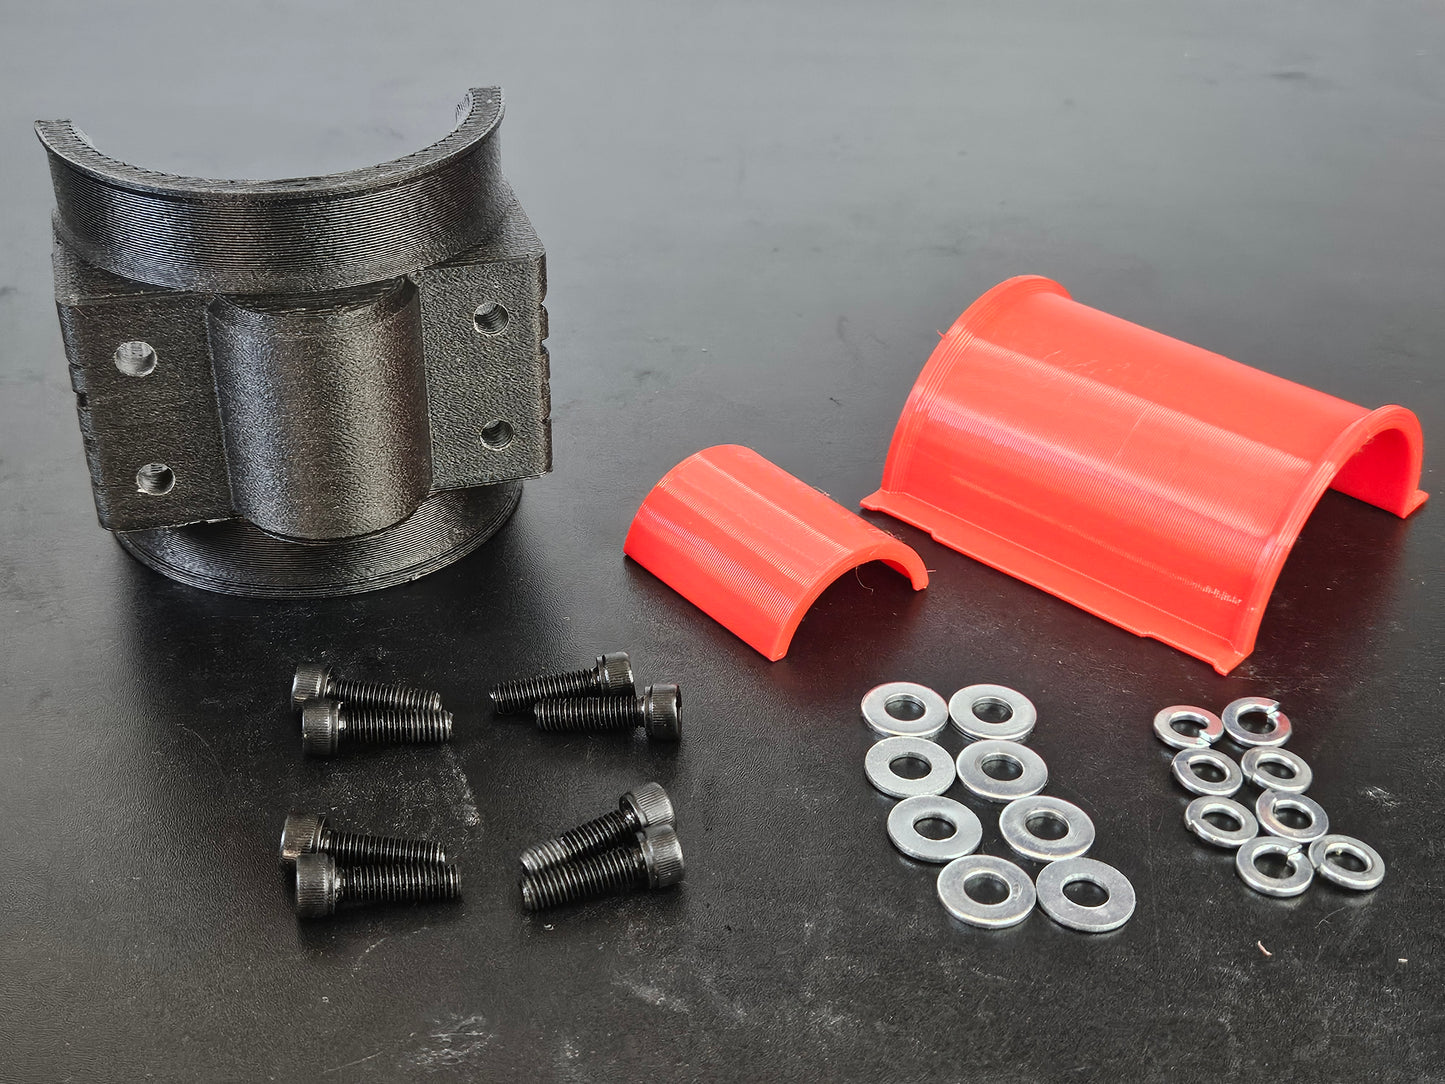
Can-Am X3 Rear Shock Remote Reservoir Relocation Kit
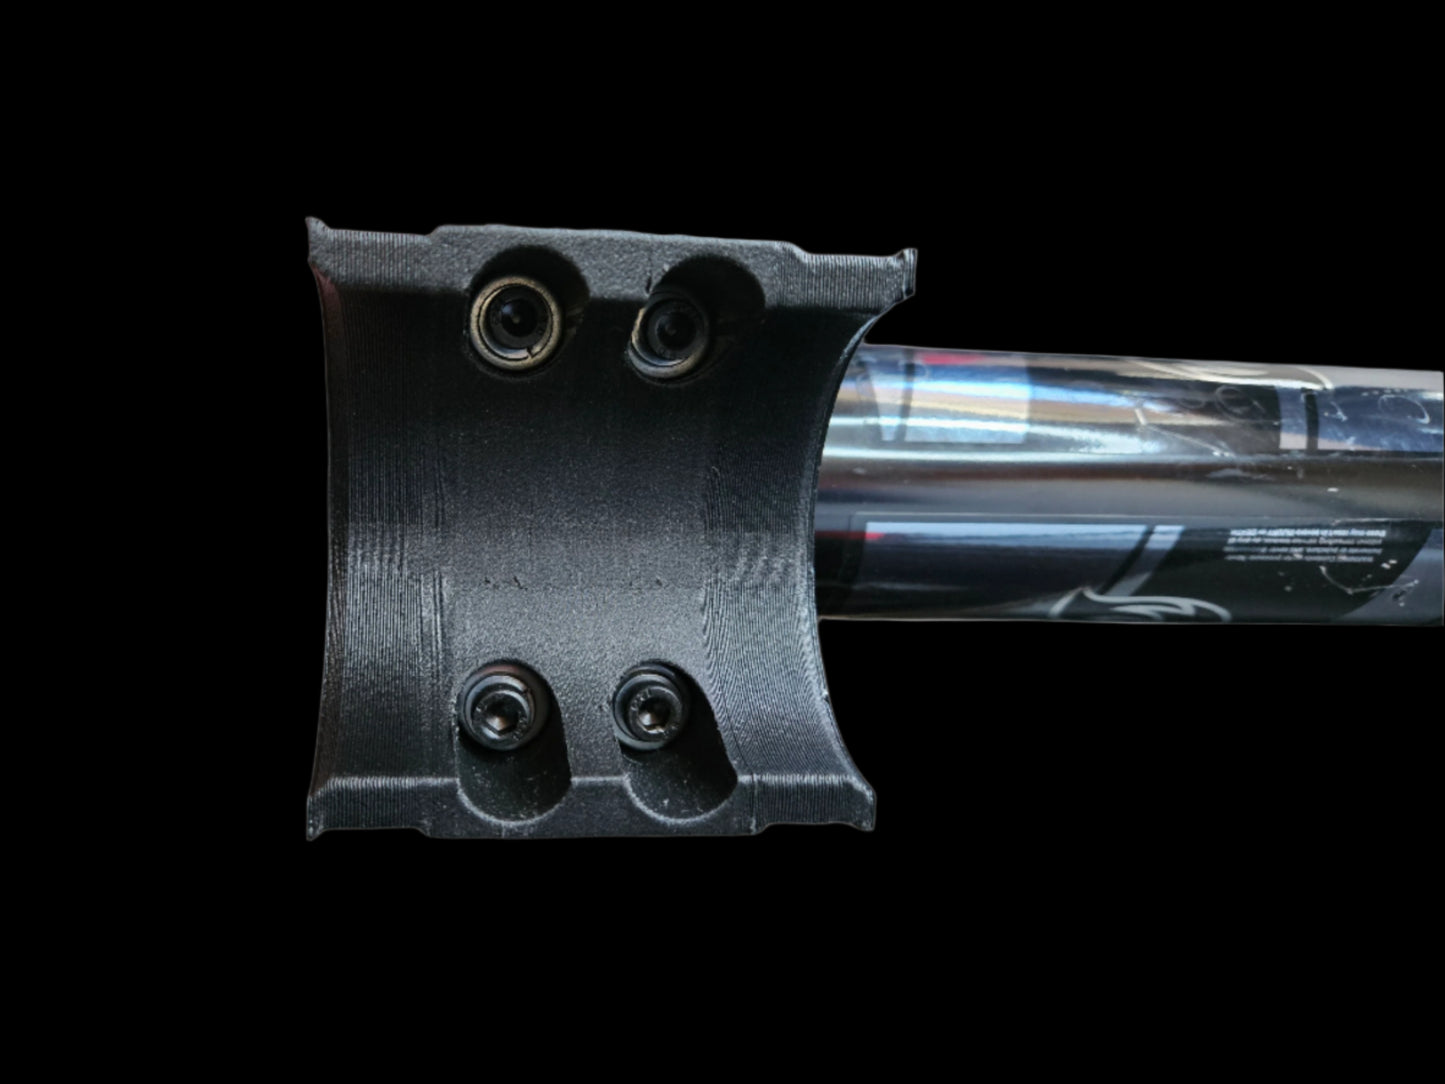
Protect your investment and enhance your Can-Am X3's aesthetics with our expertly designed Rear Shock Remote Reservoir Relocation Kit. Engineered to move your rear remote reservoirs from their vulnerable factory positions, this kit is essential for anyone running a spare tire carrier or luggage system that requires you to rotate your reservoirs outward to make room for these systems that tend to mount in the reservoirs factory location.
Why You Need This Kit:
-
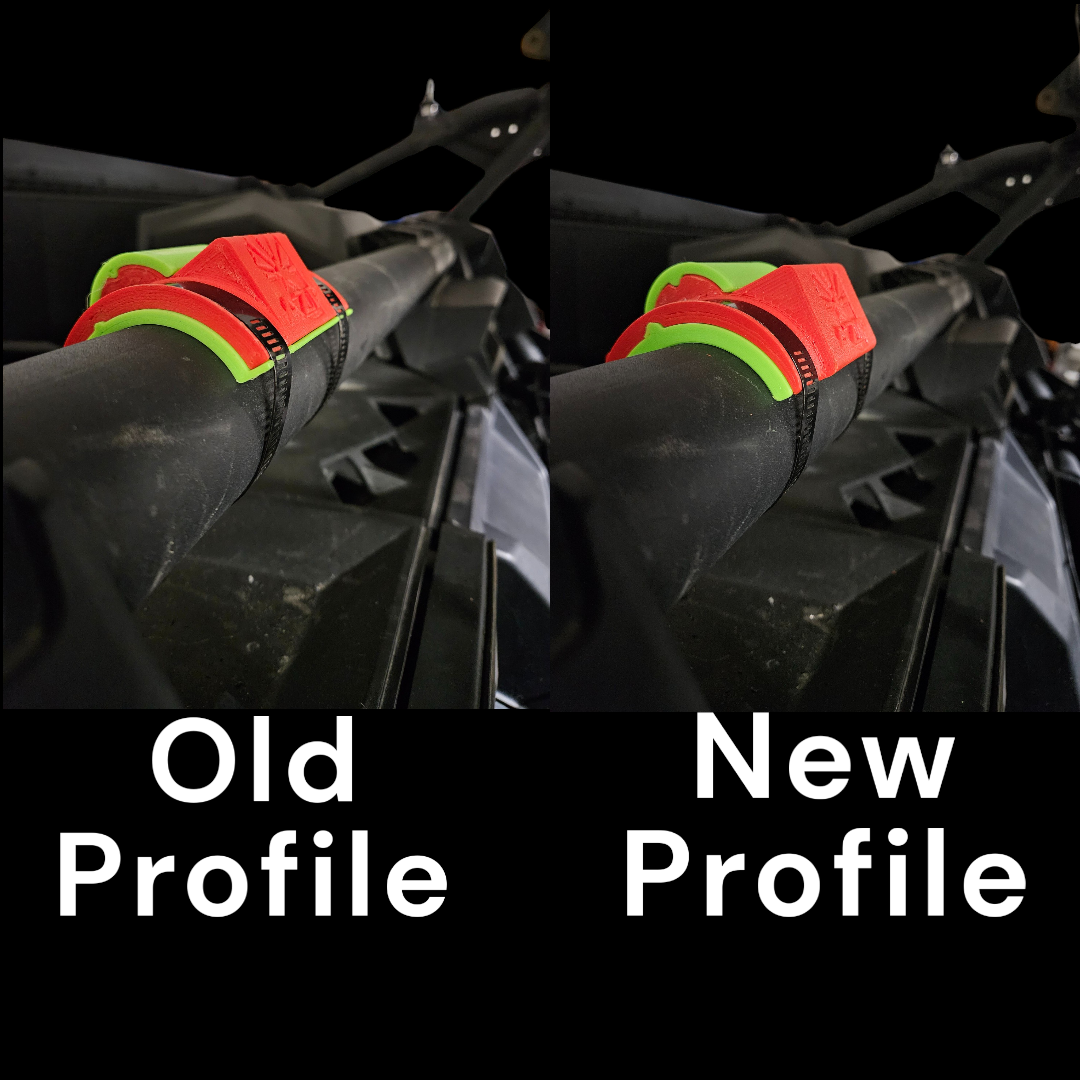
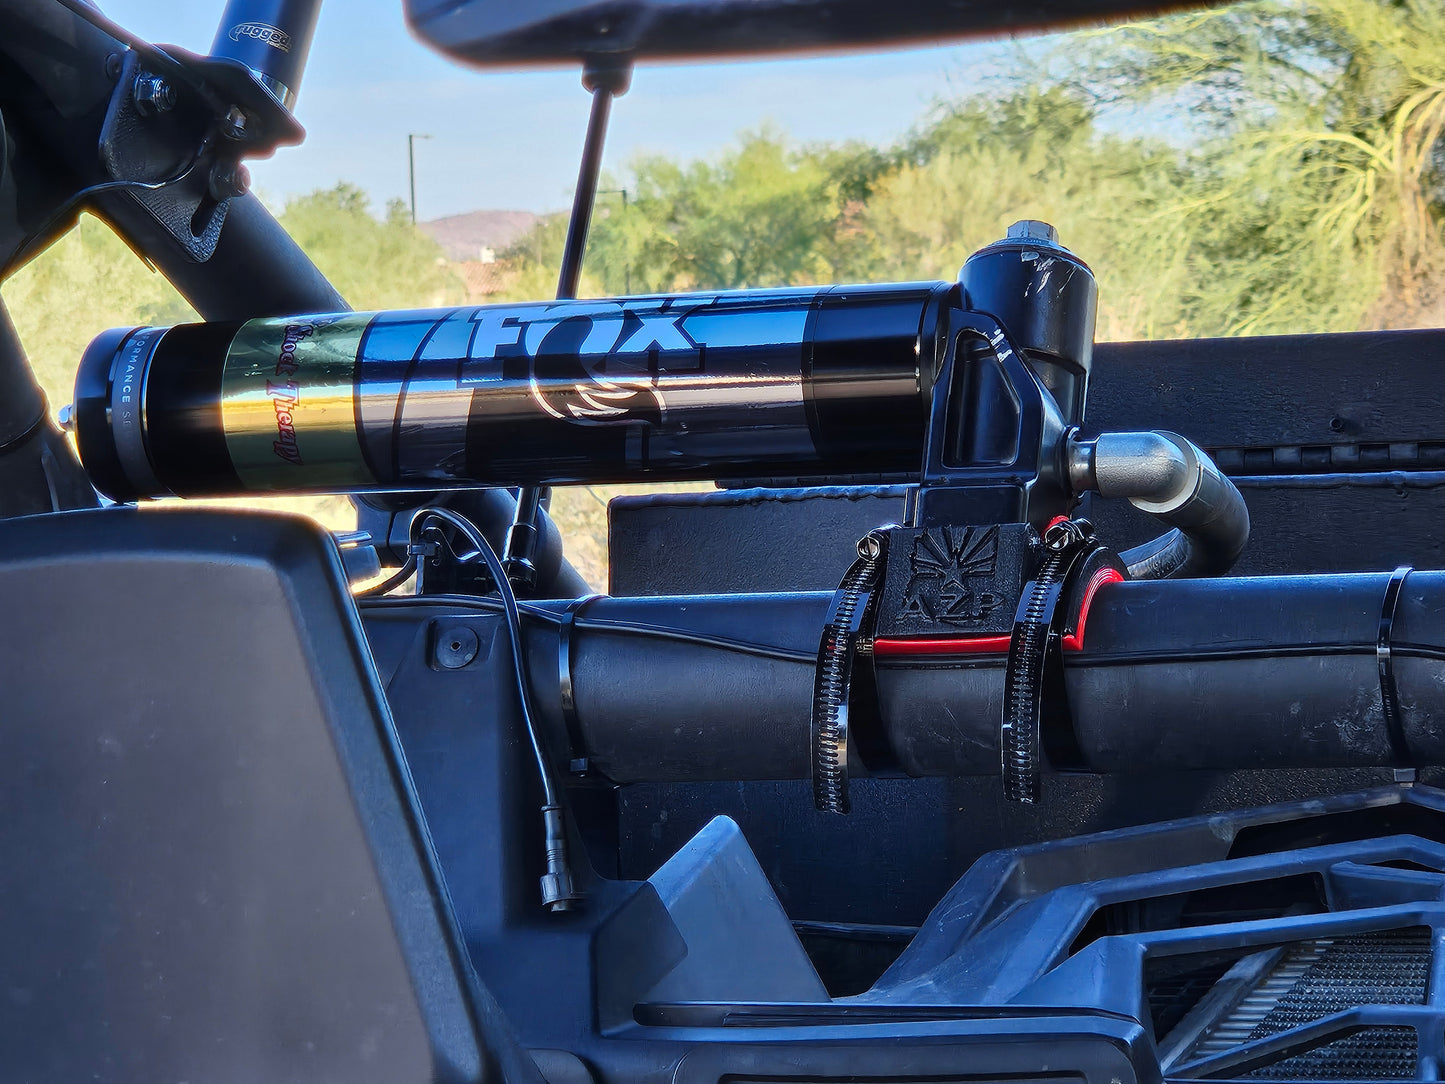
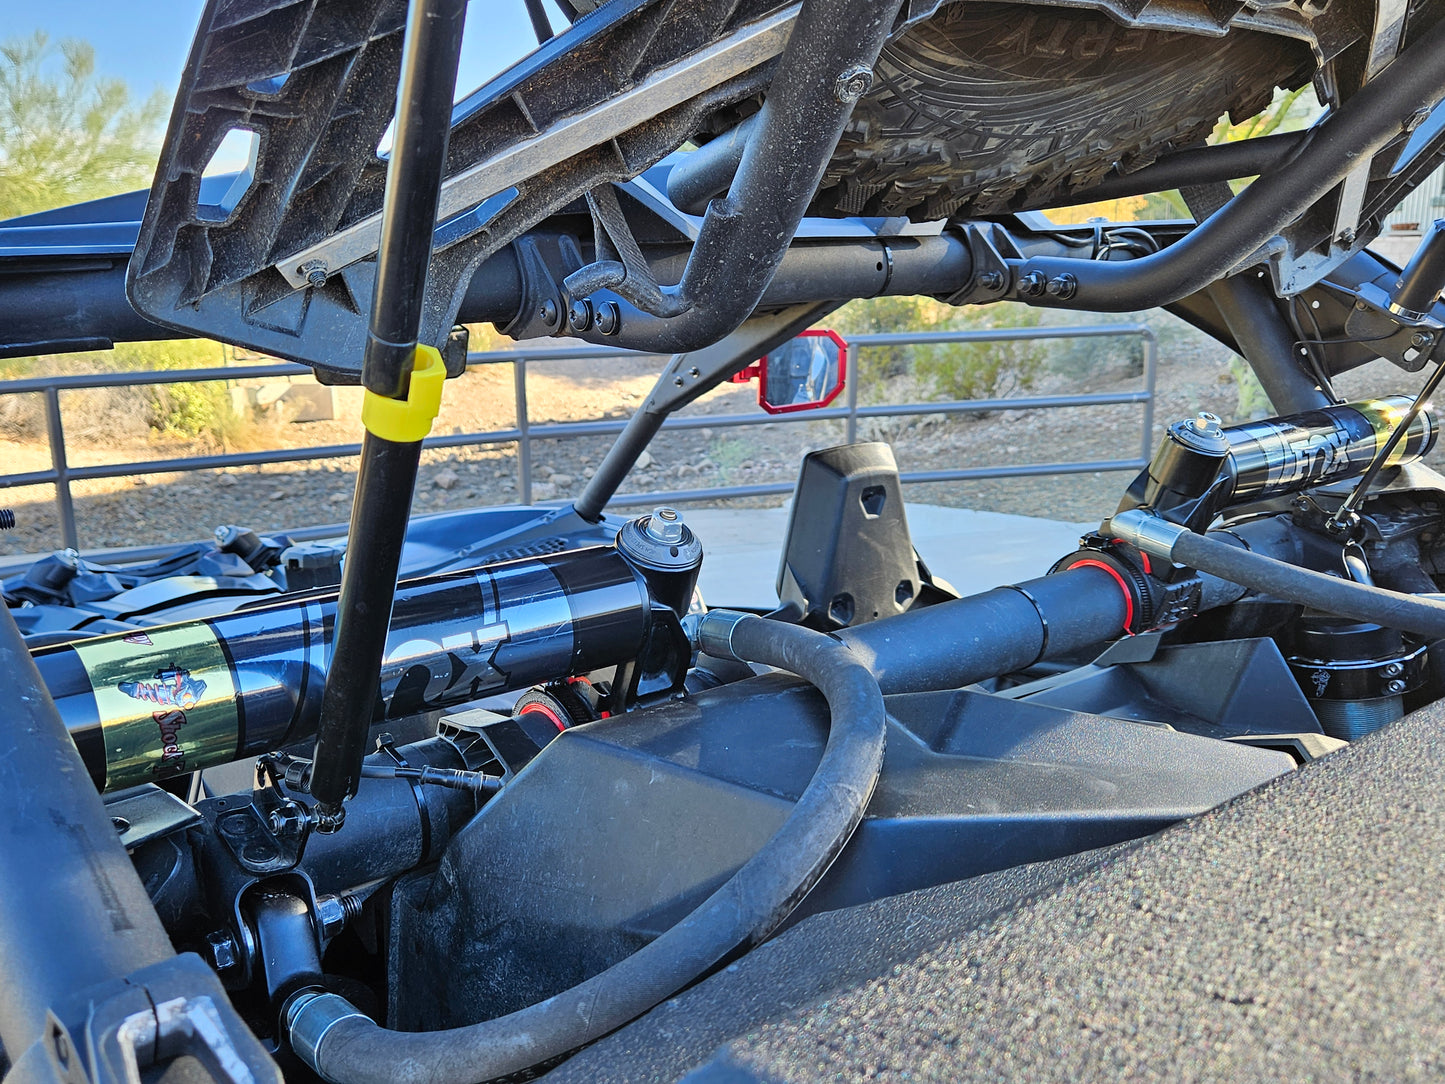
Enhanced Protection: The factory location of the rear shock remote reservoirs leaves them exposed to potential damage. Our relocation kit safeguards these crucial components by repositioning them inboard, where they are protected by the same roll cage that you trust to protect you when things go wrong. The kit is a MUST HAVE if you run Can-Am's "Lin Q Pivoting Rack" (715008295) or similar rack that requires you to roll your remote reservoirs outwards.
-
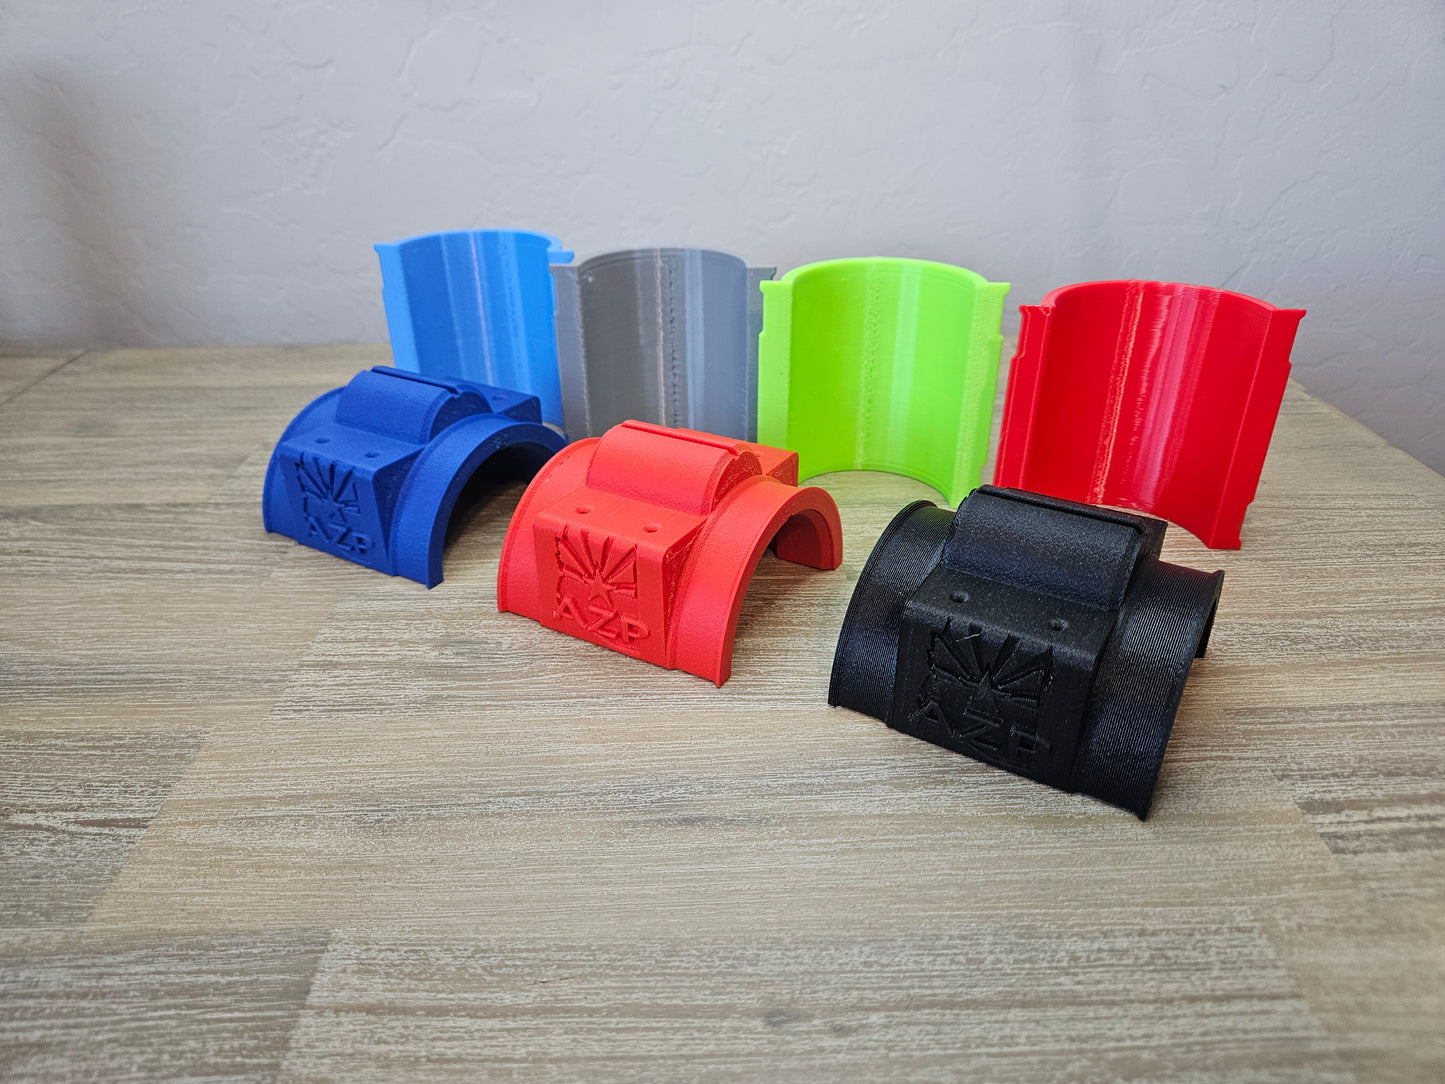
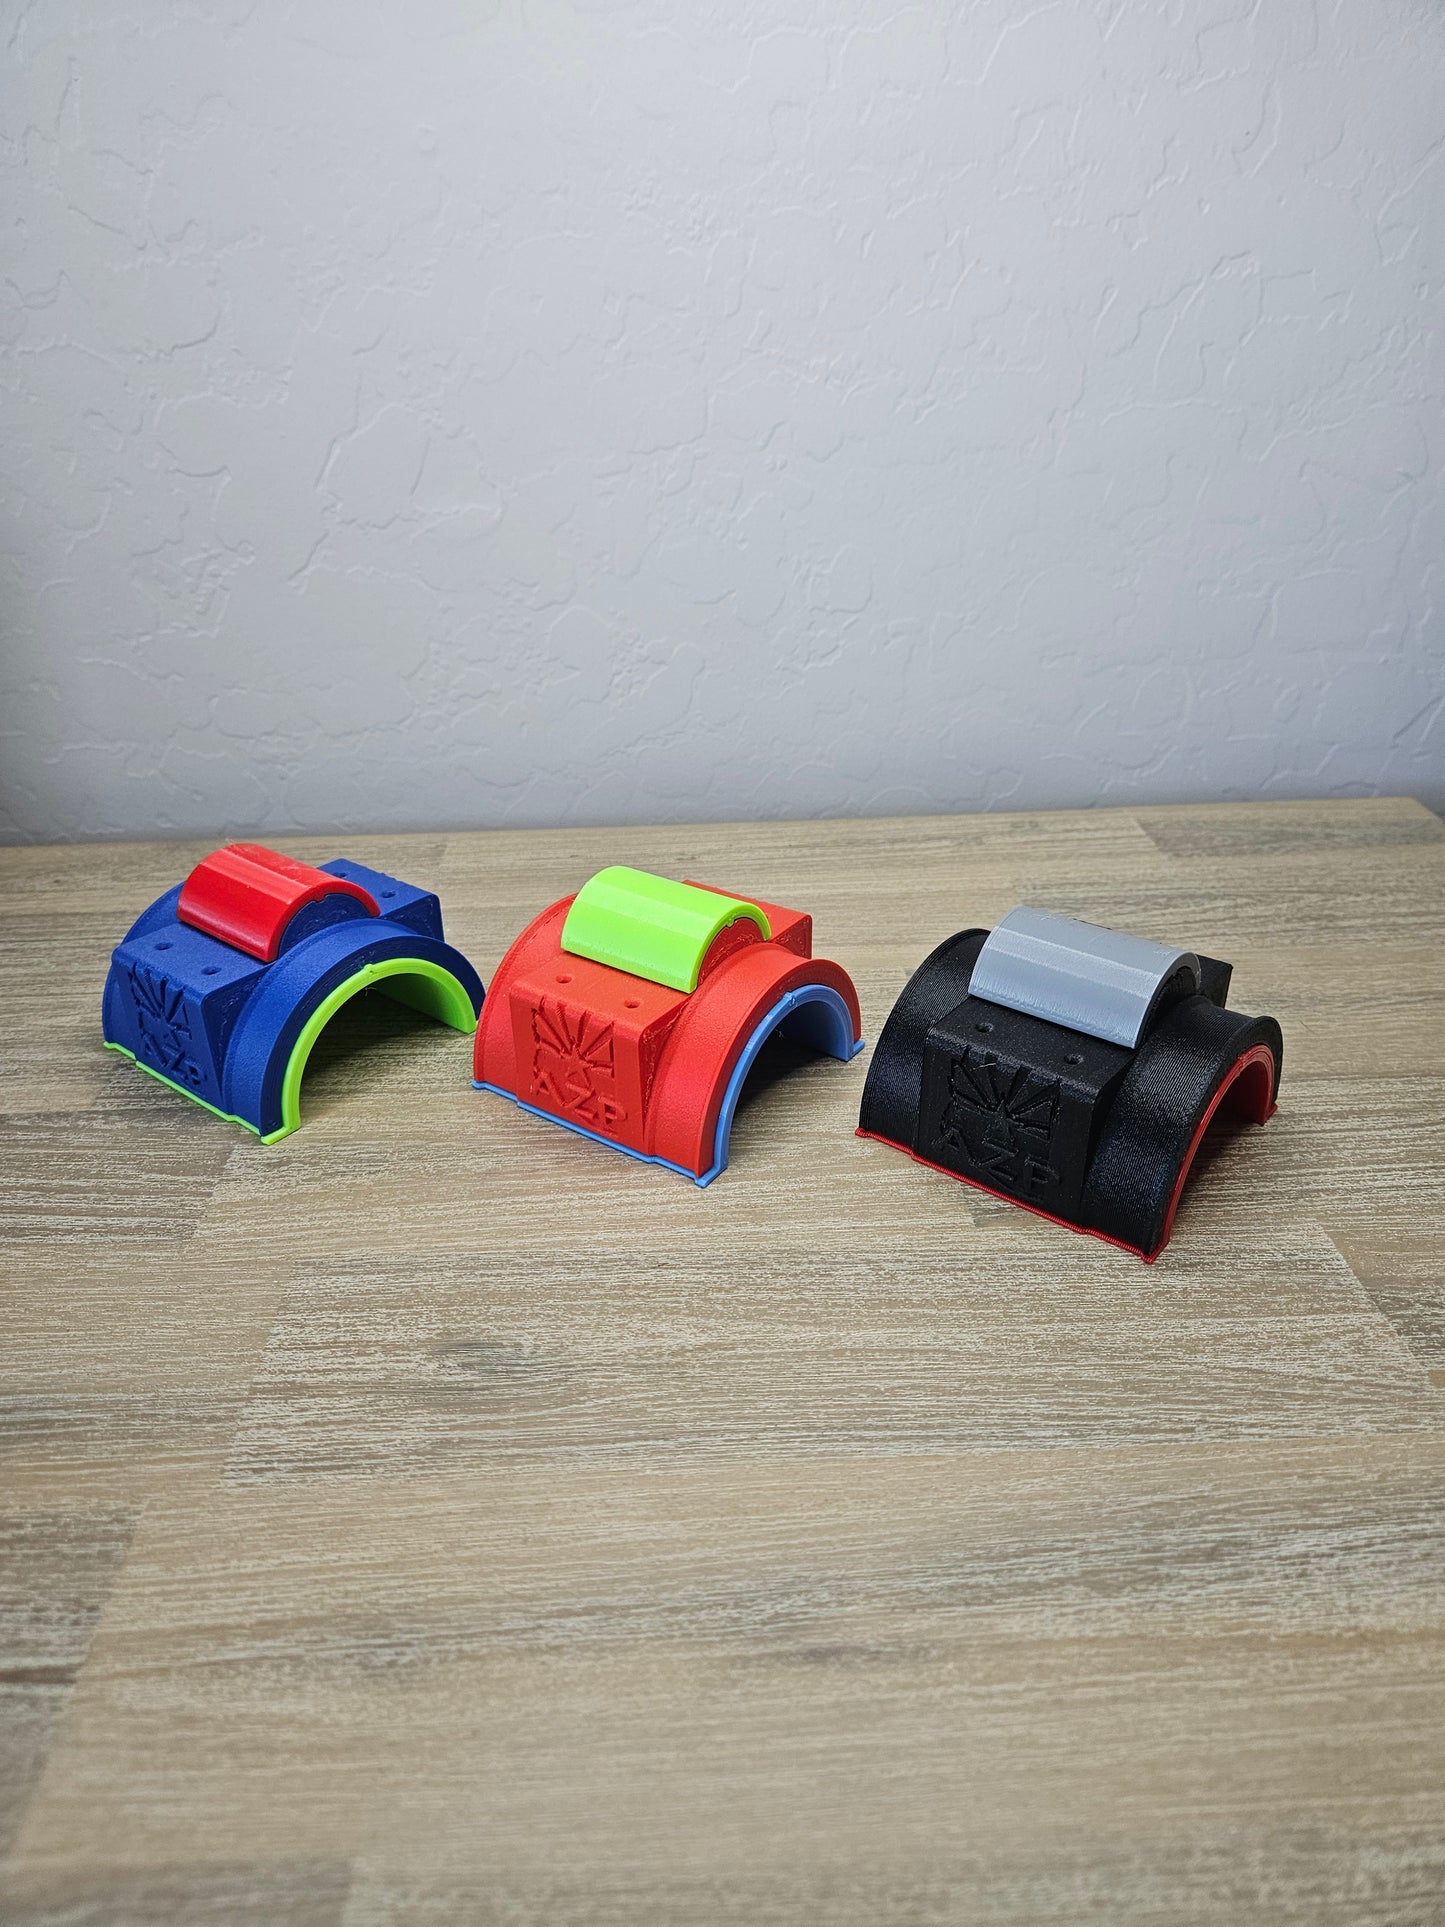
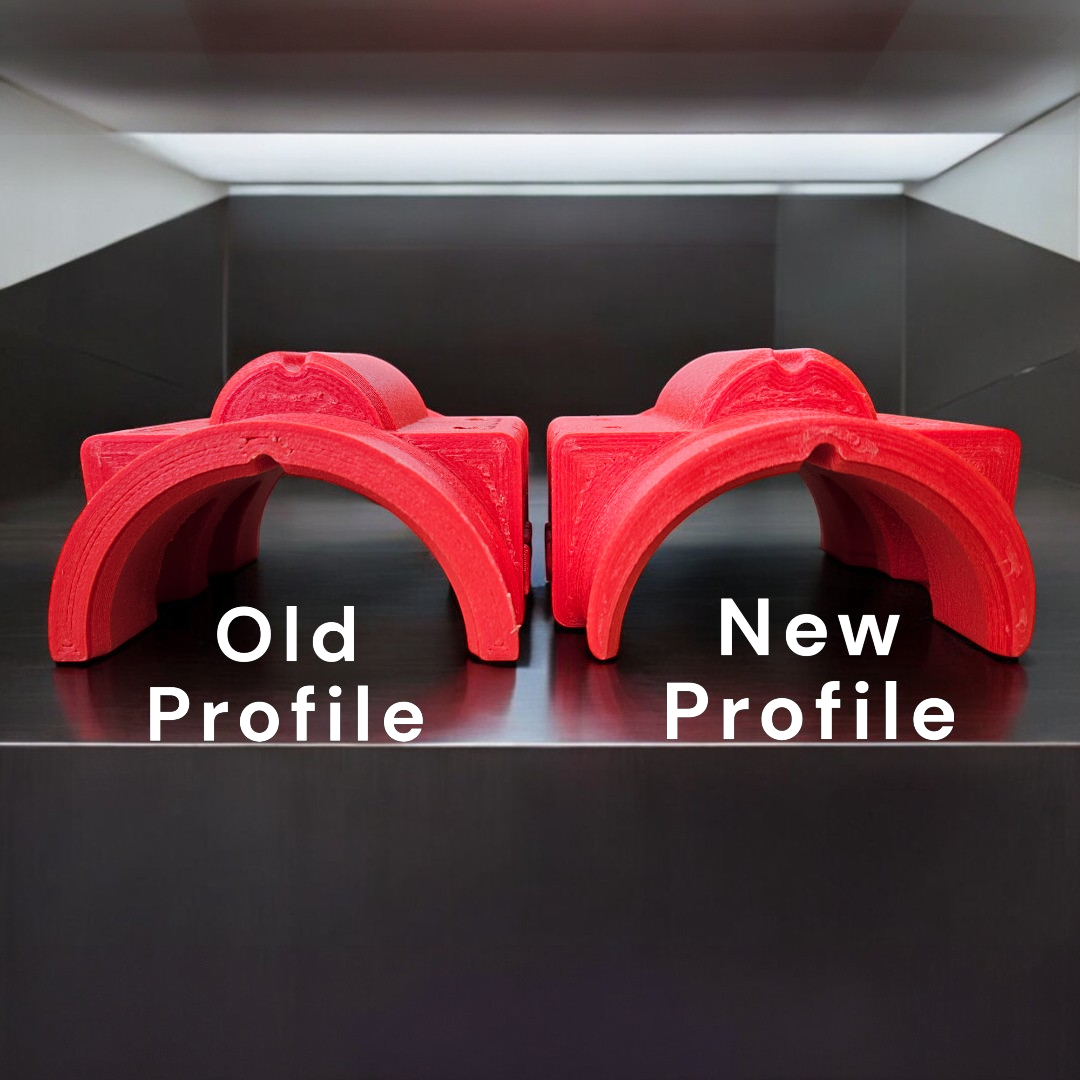
Superior Materials: The brackets are crafted from durable ABS plastic, reinforced with fiberglass for exceptional rigidity. They can support extreme loads, ensuring robust mounting solution for your reservoirs.
-
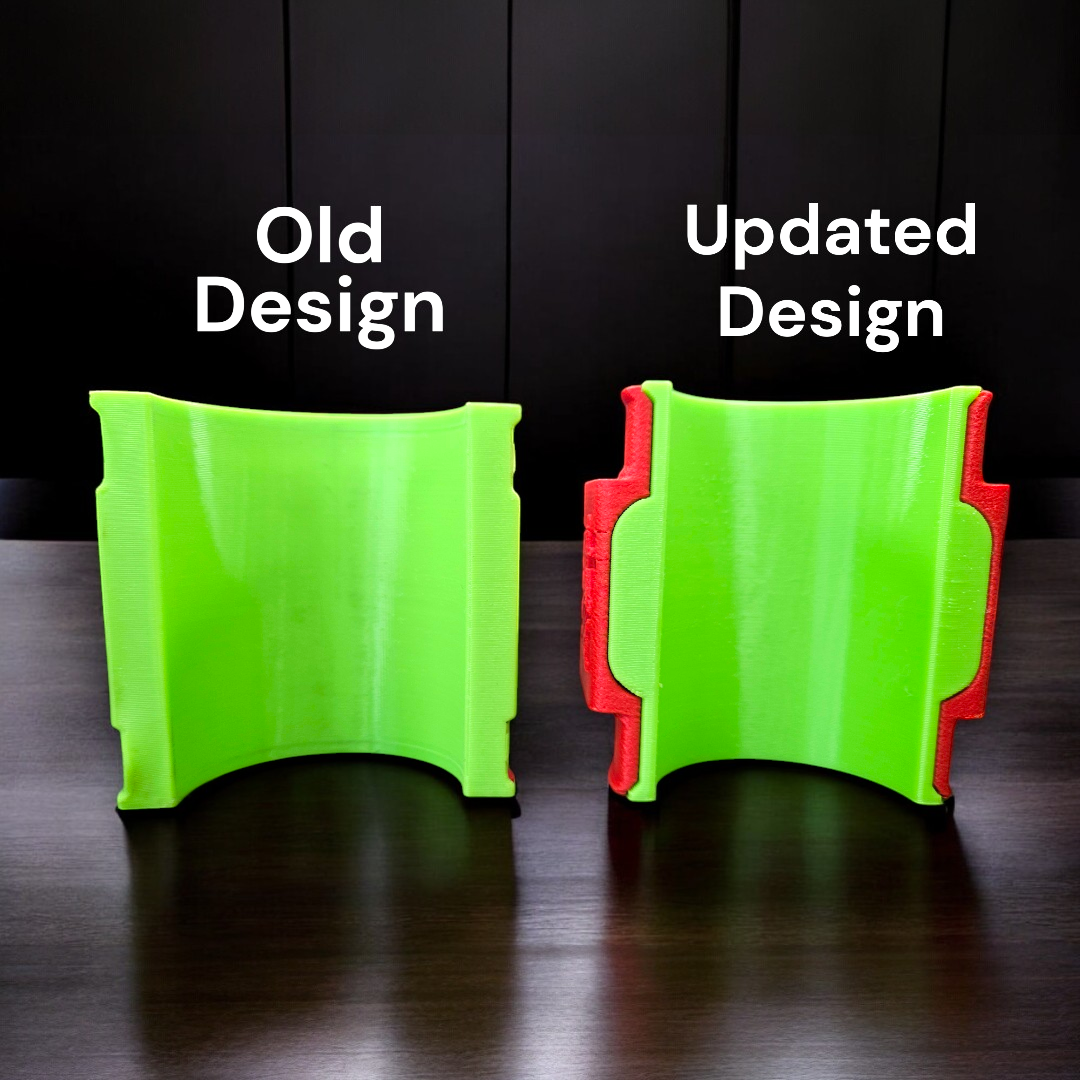
Innovative Design: The kit includes sleeves made from TPU 95A which is a soft yet very durable material. The flexibility of the material paired with specific product design features prevents the system from moving or rotating without the need of a high clamp load. The sleeves are also designed to reduce chafing against the roll cage and remote reservoirs, preserving the integrity of your components over time.
-
Comprehensive Kit: Comes complete with two brackets, two sets of bushings, and all necessary hardware for a seamless installation, allowing you to enhance your vehicle’s protection without hassle.
The Benefits:
Investing in your Can-Am X3’s suspension is one of the best performance enhancements you can make. Our relocation kit ensures you protect this investment by minimizing the risk of damage and costly repairs. With labor rates and OE parts prices on the rise, this kit is a cost-effective solution to avoid frequent visits to the repair shop.
Easy Installation:
Designed for easy installation, this kit provides everything you need to relocate your reservoirs efficiently, so you can spend less time in the garage and more time enjoying the ride.
Order Now:
Don’t leave your Can-Am X3’s remote reservoirs to chance. Order your Rear Shock Remote Reservoir Relocation Kit today and ride with confidence, knowing your suspension is protected.
Share
Installation Instructions
For these instructions the side of the trailing with the circlip/ retaining ring inside of the bushing bore will be referred to as the "Circlip Side". The opposite side of the trailing arm bushing bore is chamfered and will be referred to as the "Chamfer Side". The tooling is labeled appropriately. Do NOT use a drill or impact wrench.
REMOVE THE CIRCLIP from the trailing arm. Place one of the small washers onto the M12 bolt. Slide the bolt with washer through the bushing from the chamfered side. Install the puller cup with the number "1" on the side onto the bolt from the circlip side with the arrow facing the circlip side of the trailing arm.
Next install the large fender washer, followed by the nice bearing, the second small washer and then the nut.MAKE SURE the cup is flush against the trailing arm and the bolt is concentric in the bore before you start to remove the bushing. The hole in the tool and the bolt should be aligned with the center of the bore in the trailing arm. Use one wrench to hold the chamfer side of the bolt still and use a second wrench to turn the nut on the circlip side until the bushing is free from the trailing arm.To install the bushing, Place one of the small washers onto the bolt. Slide the bolt through the installer cup with the number "2" on it. Put the bolt,and washer through the trailing arm from the chamfered side. The arrow on cup #2 should be facing the chamfered side of the trailing arm.You'll notice the installer cup #2 has a chamfered lip that needs to be flush against the chamfer on the trailing arm. Next, apply a small amount of lube on the mating surface and slide the bushing onto the bolt from the circlip side of the trailing arm. Seat the bushing square against the bore in the trailing arm by hand. Then install the plug with the number "3" onto the bolt with the arrow on the plug facing the bushing. Next install the large fender washer followed by the nice bearing and then the second small washer followed by the M12 nut.MAKE SURE the cup on the chamfer side is flush against the chamfer in the trailing arm. The bolt should also be aligned with the center of the bore in the trailing arm and cup #3 should be flush against the bushing. The bushing should be squared with the bore in the trailing arm. Once you have verified all four of those parameters, hold the bolt on the chamfer side with a wrench while using a second wrench to spin the nut on the circlip side. Cup #3 has a shoulder that should be flush against the trailing arm when the bushing is fully seated. Remove all tooling and REPLACE THE CIRCLIP/ RETAINING RING.
View full details